Getting Started
This guide walks you through setting up TaskMate for the first time after installation.
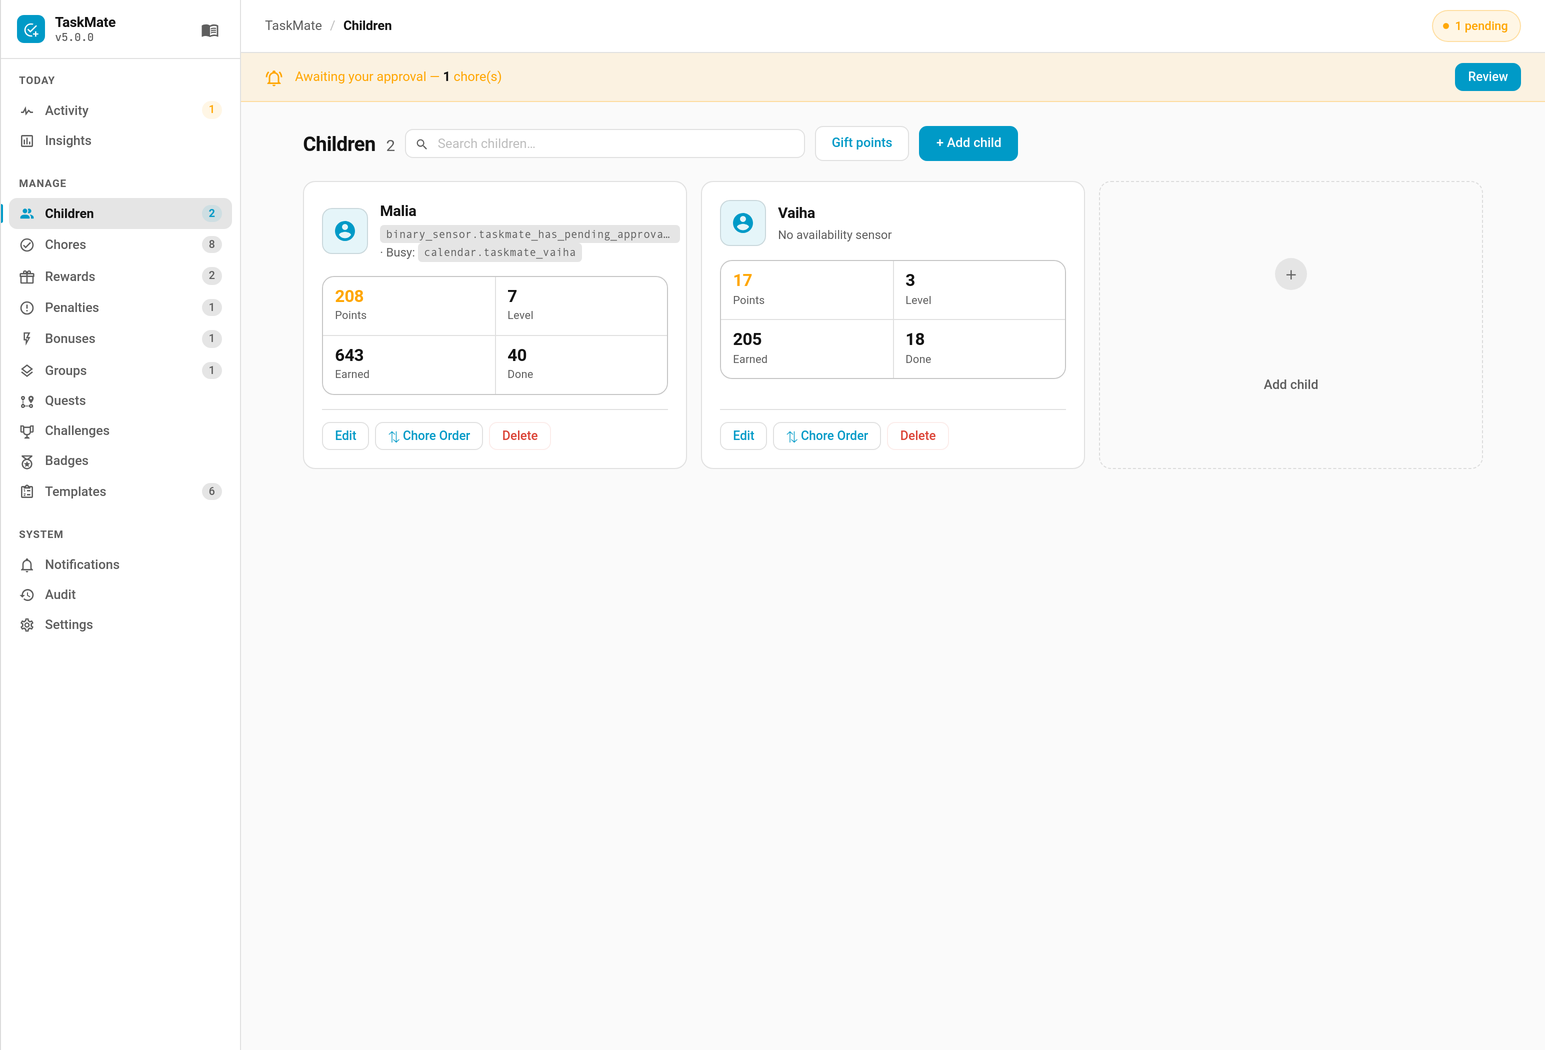
Prefer a guided start? The Setup Wizard opens by itself the first time you open the panel, and sets up children, age-suitable chores and starter rewards in one go.
Step 1 — Add the Integration
- Go to Settings → Devices & Services
- Click + Add Integration
- Search for TaskMate and select it
- You will be asked to choose:
- Points Currency Name — what you want to call the points (Stars, Coins, Bucks, Tokens, etc.)
- Points Icon — the MDI icon used throughout the UI (default:
mdi:star) - Click Submit
You can change the currency name and icon later in Settings.
Step 2 — Open the TaskMate Panel
After setup, TaskMate appears in the Home Assistant sidebar. Everything is managed from there.
The panel is organised into three groups:
| Group | Contains |
|---|---|
| Today | Activity (approvals and recent events) and Insights |
| Manage | Children, Chores, Rewards, Penalties, Bonuses, Groups, Quests, Challenges, Badges, Templates |
| System | Notifications, Audit, Settings |
Older versions of TaskMate were configured through Settings → Devices & Services → TaskMate → Configure. That menu is gone; the panel replaced it.
Step 3 — Add Your Children
- Go to Children
- Click + Add child
- Enter the child's name and pick an avatar
- Save
Repeat for each child. Each child gets their own: - Points balance - Streak counter - Chore completion history - Custom chore order
Step 4 — Create Some Chores
- Go to Chores
- Click + Add chore (or Bulk add to create several at once, or Create from template to start from a built-in pack)
- Fill in the fields:
- Name — e.g. "Make Bed"
- Points — how many points completing this chore earns
- Time of day — Morning, Afternoon, Evening, Night, or Anytime
- Schedule — specific days, a recurring interval, or a one-shot task
- Requires approval — whether a parent must approve before points are awarded
- Save
Further options — dependencies, weather conditions, visibility, bonus sub-tasks, scheduled changes — live under the Advanced sections of the same dialog.
Tip: Start with 3–5 chores. You can add more any time.
See Chores for a full explanation of every field.
Step 5 — Create a Reward
- Go to Rewards
- Click + Add reward
- Enter a name and choose an icon
- Set the points cost
- Optionally make it a jackpot so assigned children pool their points toward a shared goal
- Save
See Rewards for jackpot rewards, spending caps and the claim approval flow.
Step 6 — Add Cards to Your Dashboard
- Edit your Lovelace dashboard
- Click + Add Card
- Search for "taskmate" — you'll see all 21 cards listed
- Add the Child Card for your child's view — configure it with:
- Entity:
sensor.taskmate_overview - Child: select the child
- Add the Parent Dashboard Card for the parent view
Tip: Create two separate dashboards — one for kids (Child Card + Rewards Card) and one for parents (Parent Dashboard Card).
See Dashboard Cards for full configuration options for all cards.
Step 7 — Test It
- Open the child card on your dashboard
- Tap a chore to complete it
- If the chore requires approval, go to the parent dashboard and approve it
- Watch the points balance update
Finding IDs
Many card options and service calls require a child_id or reward_id. The easiest way to find these:
- Go to Developer Tools → States
- Find
sensor.taskmate_overview - Expand the entity attributes
- Look in the
childrenarray foridvalues - Look in the
rewardsarray for reward IDs
IDs are 8-character alphanumeric strings, e.g. a8c8376a.
Recommended Dashboard Layout
Kids' Dashboard (Sections View)
| Section | Cards |
|---|---|
| Chores | Child Card (Morning), Child Card (Afternoon), Child Card (Evening) |
| Rewards & Progress | Rewards Card, Streak Card |
Parents' Dashboard (Sections View)
| Section | Cards |
|---|---|
| At a Glance | Overview Card, Parent Dashboard Card |
| Points Management | Points Card, Approvals Card |
| History & Stats | Activity Card, Weekly Card, Leaderboard Card |
Tip: Use Section view for both dashboards — it groups related cards visually and handles responsive layout automatically.